Injection molding is a highly repeatable process, but even with precision tooling and stable materials, defects can occur. The key difference between an average supplier and a trusted partner is the ability to prevent, detect, and correct these issues before they reach the customer.
At Ningbo Yinzhou Tuoda Plastic, we have spent over 17 years studying defect mechanisms. In this post, I will explain the most common injection molding defects, their root causes, and how we avoid them through smart design and process control.
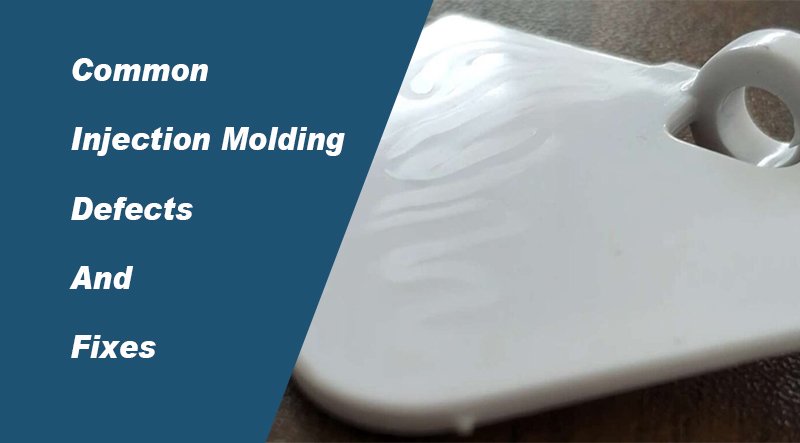
1. Sink Marks
What they look like:
Small depressions or dimples on the surface of a part, usually near thick ribs, bosses, or areas where wall thickness changes abruptly.
Why they happen:
Thicker sections of the part cool more slowly than thin sections. As the inner material shrinks, it pulls the surface inward, creating a sink mark.
How we prevent them:
- Optimize wall thickness uniformity during DFM review.
- Use ribsfor strength instead of adding thick walls.
- Adjust packing pressure and cooling time to compensate for shrinkage.
- Where necessary, add coring(removing internal material) to thick sections.
2. Warpage
What it looks like:
A part that is bent, twisted, or distorted after ejection, no longer holding its intended flatness or geometry.
Why it happens:
Uneven cooling causes different areas of the part to shrink at different rates. This can also be caused by unbalanced mold filling or low injection pressure.
How we prevent them:
- Design molds with balanced cooling channelsto ensure uniform temperature distribution.
- Position gates at the thickest section of the part to promote even flow.
- Optimize melt temperature, mold temperature, and holding pressure.
- Use simulation software(Moldflow) to predict warpage before cutting steel.
3. Weld Lines (Knit Lines)
What they look like:
A visible line or weak seam where two melt fronts meet inside the mold. They often appear around holes, inserts, or sudden changes in part geometry.
Why they happen:
When the molten plastic splits into two flows and then rejoins, the interface may not fully fuse, creating a structural weak point and cosmetic defect.
How we prevent them:
- Relocate gates to avoid melt splitting around features.
- Increase melt and mold temperatures to improve material fusion.
- Add a ventor move the weld line to a less critical area of the part.
- For highly stressed parts, consider redesigning the feature (e.g., using a chamfer instead of a sharp internal corner).
4. Flash (Burrs)
What it looks like:
Thin, excess plastic that extends beyond the parting line of the mold or around ejector pins.
Why it happens:
Clamping force is insufficient to keep the mold closed during injection. Alternatively, the mold may be worn, or venting depths may be too deep.
How we prevent them:
- Calculate required clamping force based on projected part area and injection pressure.
- Maintain the mold: inspect and replace worn parting lines and ejector pins.
- Optimize injection pressure and speed to reduce peak cavity pressure.
- During tooling, we ensure proper steel hardness and accurate machining of venting slots.
5. Short Shots (Incomplete Fill)
What it looks like:
The part is incomplete – some cavities or features are missing because the plastic did not flow to all areas.
Why it happens:
Insufficient injection pressure or speed, low melt temperature, or a lack of venting. Also caused by a small gate or poor runner design.
How we prevent them:
- Use Moldflow analysisto verify gate size, location, and runner balance.
- Select a material with adequate flow index for the part geometry.
- Increase injection speed and pressure gradually during mold trials.
- Ensure molds are properly vented to allow trapped air to escape.
6. Burn Marks
What they look like:
Black or brown streaks, scorched spots on the part surface, often at the end of flow paths or in blind pockets.
Why they happen:
Trapped air in the mold gets compressed and overheats (dieseling), or the plastic degrades due to excessive melt temperature or shear.
How we prevent them:
- Add adequate venting at the last points to be filled.
- Reduce injection speed to allow air to escape before it is superheated.
- Lower melt temperature or use a more thermally stable material.
- Clean the mold regularly to remove residue that can cause burns.
Our Systematic Approach to Defect Prevention
At Tuoda Plastic, we do not simply react to defects – we design them out from the start.
| Stage | Action |
| DFM | Flag thick walls, sharp corners, inadequate draft, and potential weld lines before tooling. |
| Mold design | Use simulation to optimize gate location, cooling, and venting. |
| Mold trial | Run a controlled first trial with documented process parameters. |
| Production | Monitor parameters in real time; perform in-process inspections (AQL). |
| Corrective action | If a defect appears, we use 8D methodology to find root cause and prevent recurrence. |
Your Parts, Delivered Right – The First Time, Every Time
Every injection molding project has some risk of defects. But with proper DFM, precision tooling, and rigorous process control, those risks become negligible.
We invite you to challenge us with your most complex parts. Our engineering team will provide a detailed DFM report and a quality plan before we ever run a production shot.
Ready to see how we handle quality? Contact us for a free DFM review.
- Email:contact@tuodaplastic.com
- Phone:+86 135 8686 8074
- Location:Ningbo, China